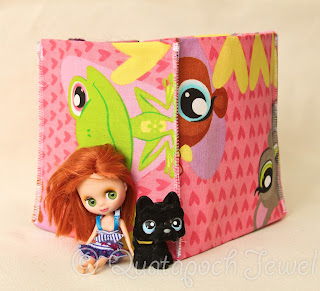
I hope my tutorial helps you and if you want to share a picture, be sure to! I would love to see!!
So what you'll need:
- fabric (1 or 2 coordinating) **The fabric size will depend upon how big of a box you want to use. I used about 1/2 yard of fabric for my box that is a 6" cube.**
- measuring stick (I love my clear ruler)
- scissors
- fabric pen/pencil for marking
- thread/sewing machine
- iron
- decor weight fusible interfacing (I buy mine from Hobby Lobby)
.jpg)
When you've measured all 12 lines, cut out the fabric. I like to use the fabric as my guide to cut another piece of fabric (your coordinating fabric) that will make up the interior of the box. I like to place right sides of fabric together for this process so I know that all the sides will match up perfectly.
Next is the fusible interfacing step. Depending on the fabric you use, you might only have to fuse on side. If you are using a light weight cotton, you might need to use interfacing on both interior and exterior fabrics.
Fuse the interfacing to the wrong side of the fabric.
Once you've finished interfacing, place both fabrics right sides together,
Pin rights sides together,
And sew, you will leave on side open but stitch the other 11 sides. I like to leave a top piece open for ease of turning.
In the picture below, you can see the one side I left open is the top of the kitties head (left side of the picture)
Now, ever so carefully go in at the 4 corners and make a tiny little snip with your scissors so the fabric is easier to work with.
Then go around and cut each corner off as close to the stitch as you can. This will make a nicer angle when you turn the fabric right side out.
Using the one open end, start turning your fabric right side out.
It'll be a little wrinkled so definitely press it
Now fold in the open end
Press for a nice crisp line,
Stitch it closed.
You'll start with one side, make sure the tops and bottoms meet up and then you are going to top stitch this.
You can go back in with a zig zag stitch or just leave the top stitch.
In this picture, you'll see 2 sides already connected.
Once you've connected all 4 sides, I like to go in with my iron and gently press the bottom to form the box.
And there you have it friends, you box is ready to be filled with toys, controllers, or whatever else you have that needs a spot! Remember to share a pic if you make this box...and pass along :)
Much Creative Love to you all,
♡ ąℓexąnʠяą


.jpg)
.jpg)
.jpg)
.jpg)
.jpg)
.jpg)


No comments:
Post a Comment